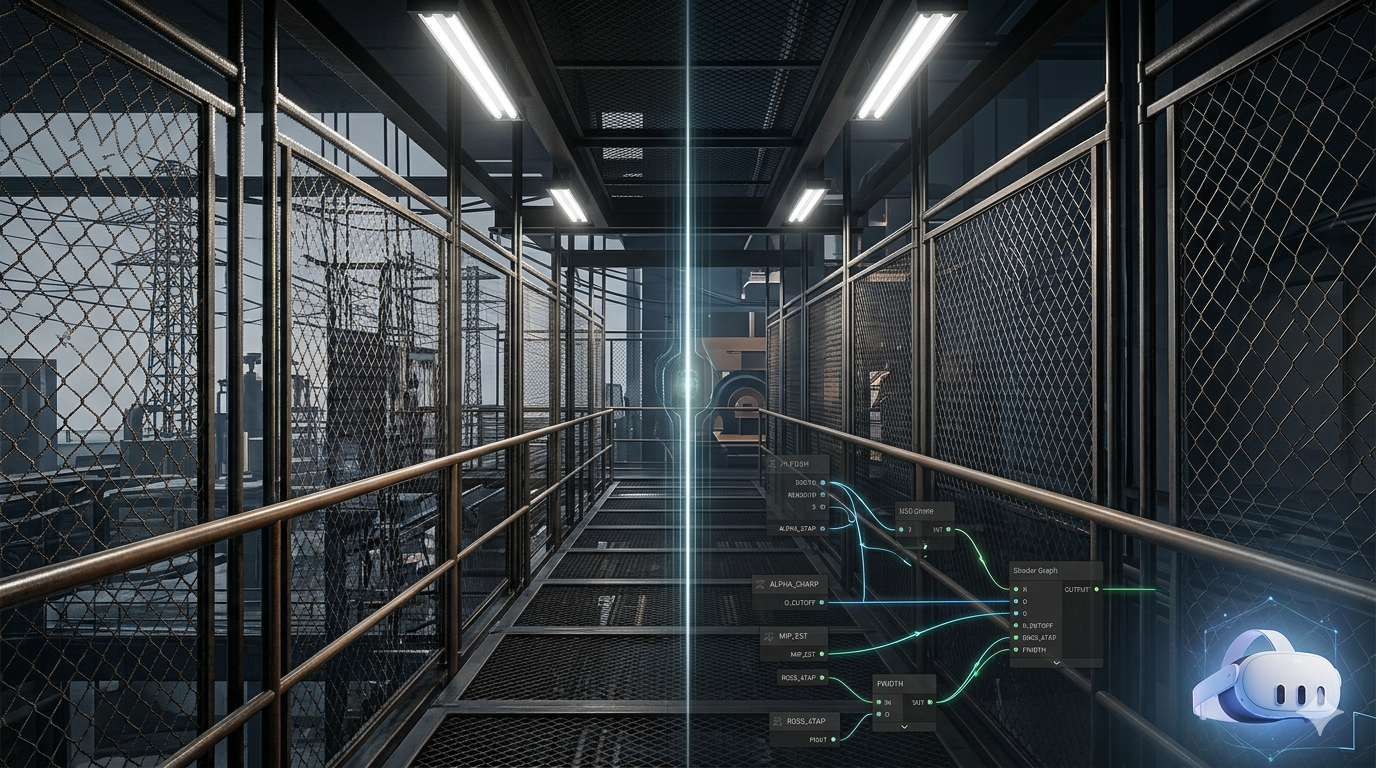
Stopping Alpha Based Fences from Dissolving at Distance in Unity
Fences and cage prefabs in general disintegrate into noise and then vanish entirely as the camera pulls back, this is however, drastically noticeable in VR, specially one being used as trainer for armed operators. The fix is a single Shader Graph custom node built around distance-based cutoff reduction via mip estimation, with fwidth sharpening and 4-tap RGSS alpha supersampling there to feed it clean input. The close-range shimmer going quiet is a side effect.
There is a class of artifact in Quest 3 development that no off-the-shelf anti-aliasing setting will solve. You build a chain-link fence, you put it on a cage prefab, you walk away from it, and the cage falls apart. At medium distance the wire disintegrates into noise. A few meters further and the cage is gone entirely: a structure that was solid a moment ago has dissolved into empty air. Walk back toward it and it materialises out of nothing. None of the URP toggles fix it. Preserve Coverage keeps some fence on screen but turns it into stipple. Increasing MSAA from 2x to 4x does nothing for the vanishing; MSAA never touches it. There is also a shimmer: up close the wire crawls in screen space as your head moves, and Foveated Rendering makes the peripheral version of that worse. But the shimmer is the thing you notice; the disappearing cage is the thing that breaks the scene. A cage that isn't there when you look at it from across the room is a gameplay and presence failure, not just an eyesore.
This is the thin-geometry sampling problem, and it is one of the genuinely hard rendering problems in mobile VR. The display panel resolution on Quest 3 is high, but a 3mm wire at 10 meters subtends about 0.6 pixels per eye. That is subpixel, and it has two consequences. The first, and the one that matters here, is that trilinear filtering pulls from higher mip levels at distance and thin features get averaged into uniform grey within two or three mips; Preserve Coverage only rescales the total alpha, not the spatial layout of the surviving texels, so past a certain distance there is simply nothing left for the clip test to keep and the cage blinks out. The second consequence is the shimmer: constant head tracking moves the camera every frame, the wire's sub-pixel coverage shifts between samples, and you get crawling pixels. Standard MSAA addresses neither: it only anti-aliases geometric edges, not alpha-clipped ones. Both symptoms share one root cause, so one function fixes both, but it is the disappearing cage that drives this work.
The fix that actually works on a tile-based mobile GPU is a single custom Shader Graph node that does three things in one function. The core of it is distance-based cutoff reduction using mip-level estimation; that is what keeps the cage from vanishing. Around it sit fwidth-based alpha sharpening for Alpha-to-Coverage and 4-tap rotated-grid supersampling of the alpha channel, which keep the fence coherent (and incidentally kill the close-range shimmer) so the distance fix has clean input to work with.
This post walks through why each of those three pieces exists and how they compose into one function that fits inside Quest 3's fragment shader budget.
Why not just use alpha clip
The default Unity approach to a fence texture is alpha clip. You author a texture where the wire is opaque and the gaps are transparent. The shader does if (alpha < threshold) discard; and the rasteriser drops the fragment. This works on PC. It is the wrong choice on Quest 3 for two reasons.
The first reason is that discard and clip() defeat the hardware's tile-based rendering optimisations. Adreno 740 uses Hidden Surface Removal in its binning stage. The HSR logic depends on knowing each fragment's depth contribution before the fragment shader runs. When a shader uses discard, the GPU does not know whether the fragment will write depth or not until after the shader executes, so it has to defer HSR. On a complex scene with overdraw this is a measurable cost. Meta's own developer documentation specifically calls this out as one of the top mobile VR performance traps (source); the exact wording is that "discarding a fragment in the middle of a fragment shader (via discard, alpha test or clip()) causes the GPU to re-render the entire tile, and should be avoided in all shaders."
The second reason is that alpha clip gives you a binary opacity decision per pixel. The wire either fully covers the pixel or fully misses it. There is no sub-pixel coverage. Combined with the small angular size of fence wires at distance, this is exactly the recipe for crawling pixels.
The right primitive on Quest 3 is Alpha-to-Coverage. A2C is a hardware feature: instead of clipping based on alpha, the fragment shader's alpha output is converted into a per-sample coverage mask. With 4x MSAA, each pixel has four sample positions, and an alpha of 0.5 will cover roughly two of them. This gives you sub-pixel opacity transitions while staying in the opaque queue with depth writes intact. It coexists cleanly with HSR because every fragment that survives the coverage test writes depth at full strength. Meta's benchmarks put 4x MSAA on Quest 3 at roughly 0.5 to 1.5 ms per frame, and A2C on top of MSAA is essentially free.
The problem is that A2C with a raw alpha channel and 4 samples per pixel gives you only 4 discrete coverage levels: 0, 1, 2, 3, or 4 samples covered. That is not enough to smoothly resolve a fence wire's edge. If your alpha texture has a sharp transition (which it will, because authoring tools snap alpha to 0 or 1 by default), A2C does not have anything to interpolate. You get the same shimmer as alpha clip, just with a slightly softer edge.
You need to widen the alpha transition zone. That is the first piece of the function.
fwidth sharpening
fwidth(x) in HLSL returns abs(ddx(x)) + abs(ddy(x)): the sum of the absolute screen-space partial derivatives. For an alpha value, it is the rate at which alpha is changing across one pixel in screen space. Near the edge of a wire, where alpha transitions from 1 to 0 over a small UV distance, fwidth(alpha) is large. In the middle of a wire or in the middle of a gap, where alpha is uniform, fwidth(alpha) is near zero.
If you rescale the alpha around the cutoff threshold using fwidth as the rescaling factor, you get a transition that always spans one pixel in screen space regardless of how sharp the underlying texture is:
Out = (alpha - cutoff) / max(fwidth(alpha), 0.0001) + 0.5;
Out = saturate(Out);
The mechanics: when alpha is well above cutoff and changing slowly, (alpha - cutoff) is large positive, fwidth(alpha) is small, the ratio is huge, and saturate clamps to 1. When alpha is well below cutoff and changing slowly, the ratio is huge negative and saturate clamps to 0. Only in the narrow band where (alpha - cutoff) is on the same order as fwidth(alpha) does the function produce intermediate values, and that band is always exactly one pixel wide. The + 0.5 recentres the curve so cutoff maps to 0.5 output (which is the threshold A2C uses internally for 2-of-4 sample coverage).
The max(fwidth(alpha), 0.0001) is a guard against division by zero on perfectly uniform regions, which would otherwise produce NaN in the corners of a tile.
This transformation is what makes A2C usable at all: the alpha transition zone is now wide enough that A2C's four coverage levels are actually being exercised, and the result is a smooth edge rather than a binary clip. It cleans up the close-range shimmer as a direct consequence, which is the secondary win.
It does nothing for the disappearing cage. At distance there is no alpha left to sharpen, and that (the cage dissolving as you back away from it) is the problem this post exists to solve.
The disappearing cage: the mipmap problem
This is the centre of the whole post. fwidth sharpening works as long as the texture has alpha to sharpen. The problem (the one that makes a cage you could see a second ago dissolve into nothing) is what happens as the camera gets further away. Trilinear filtering pulls from higher mip levels at distance. A higher mip is the texture averaged into half the resolution, then averaged again, then averaged again. On a fence texture where the wires are 1 to 2 texels thick, after two or three mip levels the wires have been averaged away into a uniform grey. There is nothing to sharpen.
Unity's Preserve Coverage feature helps, sort of. It rescales each mip's alpha values so the total fraction of pixels passing the clip threshold stays constant across mips. The total amount of fence visible is preserved. But which pixels carry the surviving alpha is essentially noise: the spatial pattern of the fence wires is gone, replaced with a stippled approximation. At medium distance this looks acceptable. At long distance it looks like static.
The trick that actually works (and this is the core of the function, the single step everything else exists to support) is to lower the clip threshold as the camera gets further away. The mip is greyer, so the texture has fewer pixels above the original threshold. Lowering the threshold lets more of those grey pixels through. The cage stays visible (faintly, washed out, but visible) instead of dissolving into nothing as you back away from it.
The clean way to know which mip is being sampled is to compute it from the UV derivatives. ddx(UV) and ddy(UV), multiplied by the texture's resolution, give you the size of one pixel in texel space. Take the log base 2 of the larger dimension, and you have the mip level the hardware would select if it were doing trilinear filtering from scratch:
float2 uvDeriv = fwidth(UV) * TexSize;
float mipLevel = max(log2(max(uvDeriv.x, uvDeriv.y)), 0.0);
float adjustedCutoff = Cutoff * saturate(1.0 - mipLevel * FadeRate);
FadeRate is a tunable parameter. A value of around 0.1 means each additional mip level reduces the effective cutoff by 10%. By mip 5 the cutoff is half its original value. By mip 10 it is essentially zero, which means almost everything passes, which means the fence becomes a translucent haze rather than vanishing entirely.
Why a FadeRate knob instead of a fixed curve? Because the right value depends on the texture. A fence texture authored with 2-texel-thick wires fades into noise faster than one with 4-texel-thick wires, and the artist needs to tune the curve for their content. Exposing it as a material parameter lets the Shader Graph user dial it in per-material without recompiling.
Why supersample the alpha
The mip-based cutoff reduction keeps the cage on screen and the fwidth sharpening keeps its edges clean. The remaining failure case is at oblique viewing angles, where a cage panel stretches away into the distance and one UV axis is heavily compressed while the other is not: exactly the geometry of looking down a long fence line, and exactly where the cage was still breaking up even after the first two pieces. The texture's anisotropic filter handles this well for colour, but the alpha channel still only gets one sample per pixel, and that sample can land in the wrong place: between two wires, on the edge of a wire, in a gap. With anisotropic filtering raised to 4x or 8x (which is essentially free on Adreno 740), the colour channel is well-behaved at oblique angles but the alpha is still under-sampled.
The fix is to supersample the alpha channel. Take four samples at sub-pixel offsets in screen space, average them, and feed the result into the fwidth sharpening. The four samples are placed in a Rotated Grid pattern: not aligned to the horizontal or vertical pixel axes, because thin geometry tends to be roughly horizontal or vertical and an axis-aligned sample grid would over-sample one direction and under-sample the other. The rotated grid catches wires at any orientation.
The offsets in pixel-space fractions are (+1/8, +3/8), (+3/8, -1/8), (-1/8, -3/8), (-3/8, +1/8). To translate those into UV offsets I use the same ddx(UV) and ddy(UV) I already computed for the mip estimation. Each sample reads only the alpha channel of the texture, so this is four texture fetches per fragment but only one channel of each fetch contributes to subsequent computation.
float a0 = Tex.tex.Sample(Tex.samplerstate, UV + dx * 0.125 + dy * 0.375).a;
float a1 = Tex.tex.Sample(Tex.samplerstate, UV + dx * 0.375 - dy * 0.125).a;
float a2 = Tex.tex.Sample(Tex.samplerstate, UV - dx * 0.125 - dy * 0.375).a;
float a3 = Tex.tex.Sample(Tex.samplerstate, UV - dx * 0.375 + dy * 0.125).a;
float alpha = (a0 + a1 + a2 + a3) * 0.25;
The cost is real but bounded. Four texture fetches plus the ALU for the averaging is approximately the cost of one extra full texture sample. On a fence material that covers 5 to 10 percent of screen area in a typical scene, this is well within budget.
The full function
All three pieces compose into one Shader Graph Custom Function Node, File mode, function name AlphaSharpen:
void AlphaSharpen_float(UnityTexture2D Tex, float2 UV, float Cutoff, float2 TexSize, float FadeRate, out float Out)
{
    float2 dx = ddx(UV);
    float2 dy = ddy(UV);

    float a0 = Tex.tex.Sample(Tex.samplerstate, UV + dx * 0.125 + dy * 0.375).a;
    float a1 = Tex.tex.Sample(Tex.samplerstate, UV + dx * 0.375 - dy * 0.125).a;
    float a2 = Tex.tex.Sample(Tex.samplerstate, UV - dx * 0.125 - dy * 0.375).a;
    float a3 = Tex.tex.Sample(Tex.samplerstate, UV - dx * 0.375 + dy * 0.125).a;
    float alpha = (a0 + a1 + a2 + a3) * 0.25;

    float2 uvDeriv = fwidth(UV) * TexSize;
    float mipLevel = max(log2(max(uvDeriv.x, uvDeriv.y)), 0.0);
    float adjustedCutoff = Cutoff * saturate(1.0 - mipLevel * FadeRate);

    Out = (alpha - adjustedCutoff) / max(fwidth(alpha), 0.0001) + 0.5;
    Out = saturate(Out);
}
There is also a _half variant for shaders running in half precision. The implementation is identical, with all types switched to half.
The inputs to wire up in Shader Graph are:
Tex: the sameUnityTexture2Dreference you use for BaseColor. The function calls it directly, so you do not feed it an alpha valueUV: the post-tiling, post-offset UV that you also feed into the BaseColor sample. The derivatives must reflect the actual sampling coordinatesCutoff: the base clip threshold, typically 0.5TexSize: from a Texture Size node connected to the same texture, providing the float2 dimensionsFadeRate: a material property, starting value around 0.1
The output goes into the Alpha block of the fragment stage. The material must have AlphaToMask enabled (which my project's existing RC_SimpleLit_LUT and RC_Unlit_Lightmapped_LUT shaders already support as a property, defaulting off). The render queue stays opaque.
Optional: sample-rate shading for the residual shimmer
With the cage no longer dissolving at distance, the only thing left is a faint close-range crawl on the wire: the secondary shimmer. The brute-force answer is more MSAA, but in URP the MSAA sample count is a pipeline/camera-global setting. Raising it from 4x to 8x to clean up one fence material taxes every opaque surface in the scene, which is exactly the per-frame cost the rest of this work was trying to avoid.
The targeted answer is to force sample-rate shading on just this one shader. By default the fragment shader runs once per pixel and MSAA only multi-samples the geometric coverage and depth; the shaded colour is shared across all covered samples. If instead the fragment shader is invoked once per covered MSAA sample, the already-allocated 4x MSAA buffer becomes 4x supersampling for that material's fragments, and the sub-pixel wire detail that was crawling now gets resolved properly. No change to the global MSAA setting, and no other material pays for it.
The mechanism is a single declaration. Marking any fragment-stage input with the sample interpolation qualifier (or simply consuming SV_SampleIndex) makes the GPU run the shader per-sample rather than per-pixel:
// presence of a sample-qualified input forces per-sample invocation
sample float2 sampleUV : TEXCOORD0;
In Shader Graph this lives in a Custom Function node, and the whole per-sample path is gated behind a Boolean Keyword declared as a Shader Feature. That compiles two variants (one with the sample qualifier present, one without) so the supersampling can be switched off per-material in the inspector or toggled at runtime (and the unused variant stripped from builds where the budget is tight). On the scenes where the residual crawl is not worth the cost, the keyword is simply off and the shader is byte-for-byte the per-pixel version.
The cost is bounded the same way the alpha supersample is: it scales with the MSAA sample count times the fence's screen coverage, and the fence is a small fraction of the frame. It is the right lever precisely because it is opt-in per-material and uses samples the GPU already allocated, rather than a global MSAA bump that would hit everything.
Texture authoring rules
The function does the heavy lifting in the shader, but it cannot rescue a badly-authored texture. The companion settings on the import side that matter:
- Aniso Level: at least 4, ideally 8. Quest 3's GPU handles anisotropic filtering cheaply, and fence textures are almost always viewed at oblique angles. Leaving Aniso Level at 1 is the single biggest miss in default Unity texture imports for this kind of content
- Mipmap Filtering: Kaiser gives sharper mip levels than the default Box filter. The difference is small but real for thin features
- Preserve Coverage: on, with the alpha threshold set to match the shader's Cutoff (0.5 in my case). This is what keeps the total alpha consistent across mips. Without it, the mip cutoff adjustment in the shader has too much work to do
- Trilinear filtering: on, so blends across mip levels are smooth and the shader's mip estimation maps to actual hardware sampling behaviour
These settings are not optional. The shader assumes them. If Preserve Coverage is off, the cutoff adjustment over-corrects. If Aniso is at 1, the oblique-angle case is worse than the supersampling alone can compensate for. If mipmaps are off entirely, the mip estimation produces garbage and the cutoff snaps to its base value at all distances.
LOD strategy
The shader handles the medium-distance and oblique-angle cases. It does not handle the very-far case where the fence subtends less than one pixel. Nothing in screen space can render below one pixel coherently. The right answer is to switch to a different representation at that distance.
The LOD chain I landed on for fences and cages:
- LOD0, screen height above 15 percent: full 3D mesh with individually modelled wires, opaque shader, MSAA-only AA
- LOD1, 8 to 15 percent: simplified mesh where adjacent wires are merged into thicker strips, A2C plus the AlphaSharpen function
- LOD2, 3 to 8 percent: billboard quad with a baked fence texture, A2C plus AlphaSharpen with anisotropic filtering doing most of the angle work
- LOD3, 1 to 3 percent: simplified card with a uniform translucent appearance, transitioning out via dithered fade
- Below 1 percent: not rendered
The transitions need dithered cross-fade rather than alpha-blended cross-fade. Dithered fade keeps the material in the opaque queue and preserves depth writes. Alpha-blended cross-fade requires either rendering both LODs in the transparent queue (which fights depth) or a more complex sort. Dithered is the right primitive here.
What this costs in profiling
A RenderDoc capture of a scene with two fence panels (one near, one mid-distance) using the full AlphaSharpen function shows:
- The fence draw calls themselves remain in the opaque queue. Depth writes happen. Hidden Surface Removal still works for everything behind the fence
- Each fence fragment performs four texture fetches for the alpha supersample, plus the standard BaseColor fetch. Total approximately 5 fetches per fragment instead of 1
- Fragment ALU is dominated by the texture sample cost. The fwidth, log2, and saturate operations are negligible against the cost of memory access
- Total measured impact on a scene with around 8% screen coverage of fence material was approximately 0.15 ms additional fragment time at 90 Hz
That is the cost on Quest 3. On a more sparsely-fenced scene the cost scales linearly with coverage. On a heavily-fenced scene you would want to dial back the supersample or accept the cost as the price of the visual.
What this does not solve
The function does not handle the case where the fence material is also using Meta's depth occlusion subgraph (SG_MetaOcclusion). The occlusion subgraph outputs its own alpha contribution that gets combined with the texture alpha before reaching the AlphaSharpen function. The fwidth sharpening still works on the combined alpha, but the supersample only reads from the texture, so the occlusion alpha is single-sampled. In practice the occlusion boundary is a relatively smooth depth comparison that already AA's reasonably, but if you needed both edges to be A2C-clean you would need a second supersample of the occlusion alpha as well. I have not gone that far. The occlusion-fence interaction in my scenes looks fine without it.
The function also does not address shimmer caused by specular highlights on the fence's BaseColor. Specular shimmer is a separate problem that requires either specular anti-aliasing in the lighting model (LEAN, CLEAN, or Toksvig mapping) or roughness biasing at distance. I use a lookup-table-based simple lit shader (RC_SimpleLit_LUT) which is reasonably forgiving on this front because the specular response is precomputed and low-frequency, but it is not zero.
Where this leaves the LOD ticket
This shader is one part of a larger LOD system for fences and cages. The other parts (the prefab with LOD groups, the dithered cross-fade implementation, the RenderDoc captures across all LOD tiers) are downstream of the shader being right. With the shader stable, the rest is plumbing.
The Blender side of the original ticket (template fence and cage models with consistent LOD chains) is deferred. That is its own piece of work and outside the rendering scope.
The thing I take away from this is that the disappearing-cage problem on mobile VR is solved by mip-aware cutoff reduction: lowering the clip threshold as the texture greys out at distance so the structure stays on screen instead of blinking into nothing as you walk away from it. fwidth sharpening and alpha supersampling are well-understood techniques, and here they exist mostly to give that mip-aware step clean, coherent input to act on, closing the gap on oblique angles and killing the close-range shimmer along the way. Put all three in one Custom Function node and the cage stays solid as you back away from it on the headset, which is the entire point. The shimmer going quiet is the bonus.